반응형
아주 기본적인 TableView 생성 과정이다.
1. 프로젝트를 생성한다.
- Interface는 Storyboard으로 지정했다.
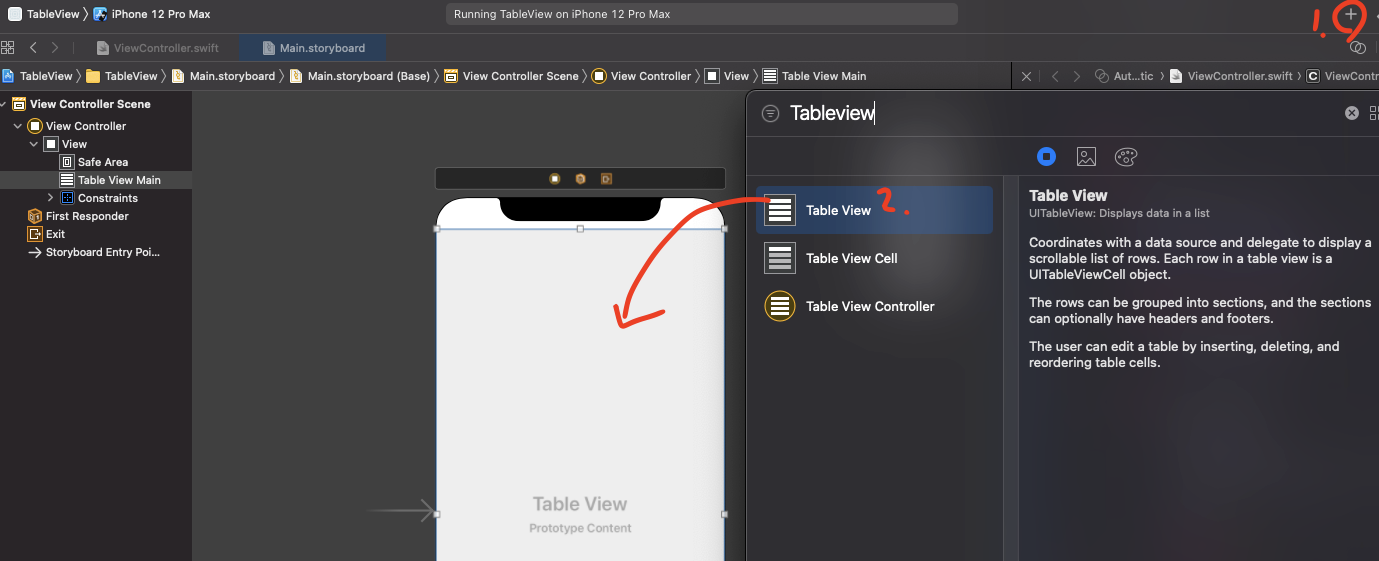
2. Main.storyboard 파일을 열어서, TableView를 ViewController에 삽입한다.
3. TableView를 화면 크기에 맞춰, 최대한 늘린 후 Add New Constraints 를 추가한다.

4. Assistant를 열어서, ViewController과 연결된 swift를 소스를 화면에 노출시킨다.

5. TableView를 마우스로 잡고, Ctl 키를 누른채로 TableView를 끌어서, 소스에 드래그 앤 드롭한다.

6. Name 설정 후, Connect를 누르면, 소스와 맵핑되는 코드가 생성된다.

7. TableView 가 작동되도록 소스를 수정한다.
//
//  ViewController.swift
//  TableView
//
//  Created by sungjin on 2021/08/24.
//

import UIKit

class ViewController: UIViewController, UITableViewDataSource, UITableViewDelegate {

    @IBOutlet weak var tableViewMain: UITableView!

    func tableView(_ tableView: UITableView, numberOfRowsInSection section: Int) -> Int {

        // cell의 개수
        return 100
    }

    func tableView(_ tableView: UITableView, cellForRowAt indexPath: IndexPath) -> UITableViewCell {

        // 임의로 cell 생성
        let cell = UITableViewCell.init(style: UITableViewCell.CellStyle.default , reuseIdentifier: "tablecelltype1")

        cell.textLabel?.text = "\(indexPath.row)"

        return cell

    }


    override func viewDidLoad() {
        super.viewDidLoad()

        tableViewMain.delegate = self
        tableViewMain.dataSource = self

    }


}
8. 결과물

반응형
'Programming > IOS' 카테고리의 다른 글
| [Swift/iOS] TableView - move to screen (0) | 2021.08.25 |
|---|---|
| [Swift/iOS] TableView - Custom Cell (0) | 2021.08.24 |
| [Ios/ObjectC]웹뷰 자바스크립트에서 ios 함수 호출(bridge, JSExport) (0) | 2018.08.09 |
| String 날짜를 NSDate로 변경 후 NSString 포맷형식에 맞게 변환하기 (0) | 2017.07.21 |
| NSMutableArray 사용 (0) | 2017.01.24 |